29th April 2020
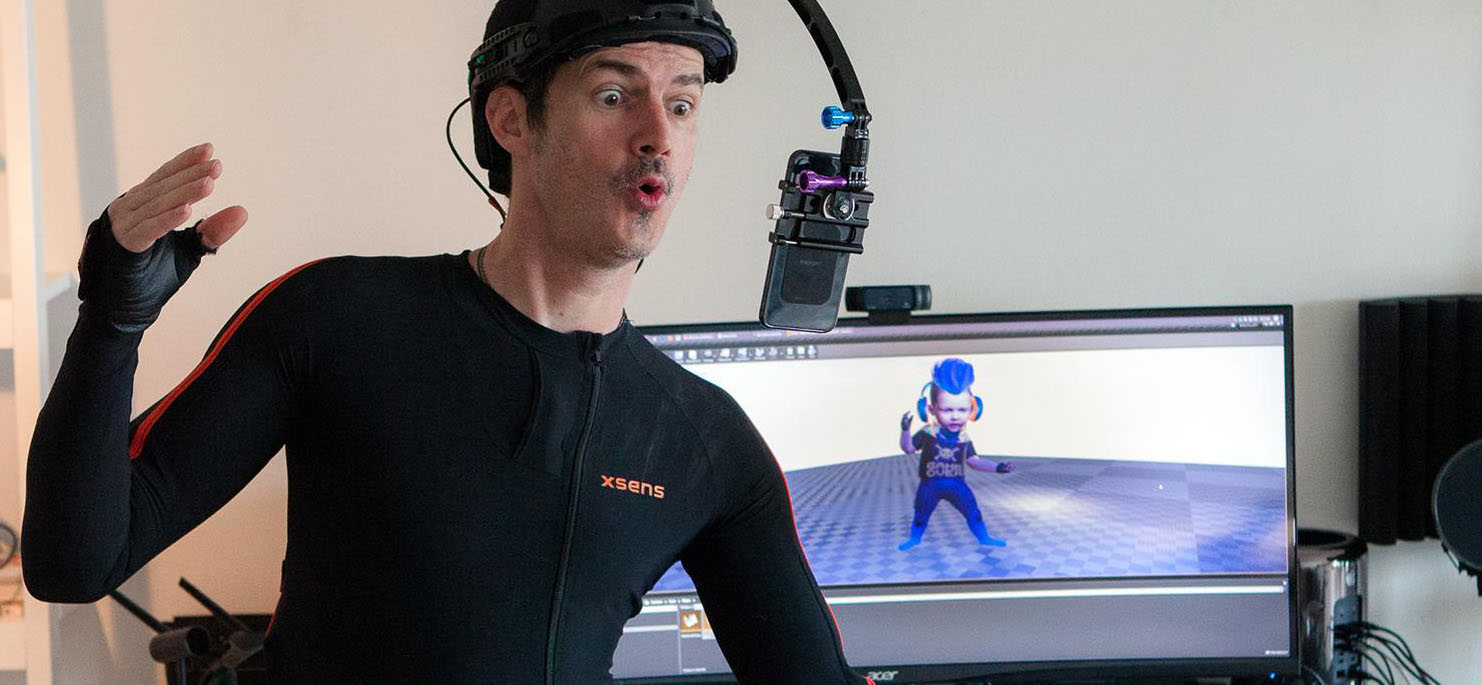
Xsens presents five easy steps to set up your in-home studio. We seek to engage with and celebrate artists who have made the transition to a home-based studio and to inspire others to do the same. Users of Xsens MVN Animate can produce production-grade motion data without the need for a dedicated mocap volume, cameras or a complicated setup.
We have made an easy overview of the 5 essential steps to setup your in-home studio:
Step 1: Software Installation
Step 2: Set up your Xsens Network
Step 3: Put on the Suit
Step 4: Hardware Connection
Step 5: Calibration
Additional steps to do your mocap session:
Step 6: Capture Data
Step 7: HD Reprocess and Export Files
Not an Xsens customer?
Get your own in-home mocap studio!
Find out more about the 5 steps to set up your Xsens in-home studio:
Step 1: Software Installation
Please download the latest MVN Animate / Analyze and activate the license key you received in your email inbox from Xsens Customer Service.
Step 2: Set up your Xsens Network
If you would like to have a hardware connection and access to the internet, please follow these instructions.
Instructions for MVN Link (lycra suit)
1. Take the Asus Access Point, its power supply, the power adapter (if necessary), and the Ethernet cable from the Link case.
2. Power up the Access Point.
3. Setup your network. There are 3 options:
a. Take the Ethernet cable from the kit, plug one end into an Asus yellow port and the other end into your computer. If your computer doesn’t have an Ethernet port, use the Ethernet to USB adapter that came with you Link system.
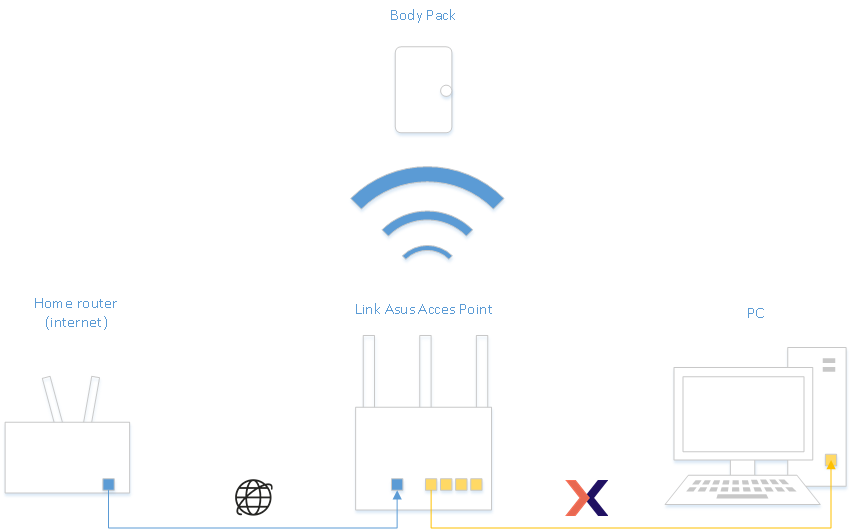
b. If you want to use the Asus Access Point with internet, you’ll need a 2nd Ethernet cable. Connect your home router to the Asus via the blue WAN connection. Additionally, you’ll have to Set the Asus to Router Mode (step 1-6). Like this:
 c. Another option for the Link system would be to connect the Asus router, your home router, and your PC to an Ethernet switch. In this scenario, there is no need to connect your home network to the Asus blue WAN connection. There is only one Ethernet cable between the Ethernet switch and the Asus router and its plugged into a yellow port.
Instructions for MVN Awinda (straps)
For an MVN Awinda system, simply plug the Awinda station (the one with the antenna) into your PC using its USB cable. No need to change or add to your home network setup.
Step 3: Put on the Suit
Whether you are with a buddy or alone, you can put the suit on by yourself.
Instructions for MVN Link (lycra suit)
1. For the Link system, take the suit out and all MTx motion trackers except for the one labeled “Prop”.
2. Grab the body pack, the battery, and the upper and lower body extension cables as well.
3. Lay the suit on a flat surface (e.g. table or bed), unzip all suit zippers (arms, legs, middle), and place the trackers on the correct Velcro patches. Watch this helpful tutorial on Preparing MVN Link Hardware to understand which trackers go where. The suit does not need to be worn when placing the trackers.
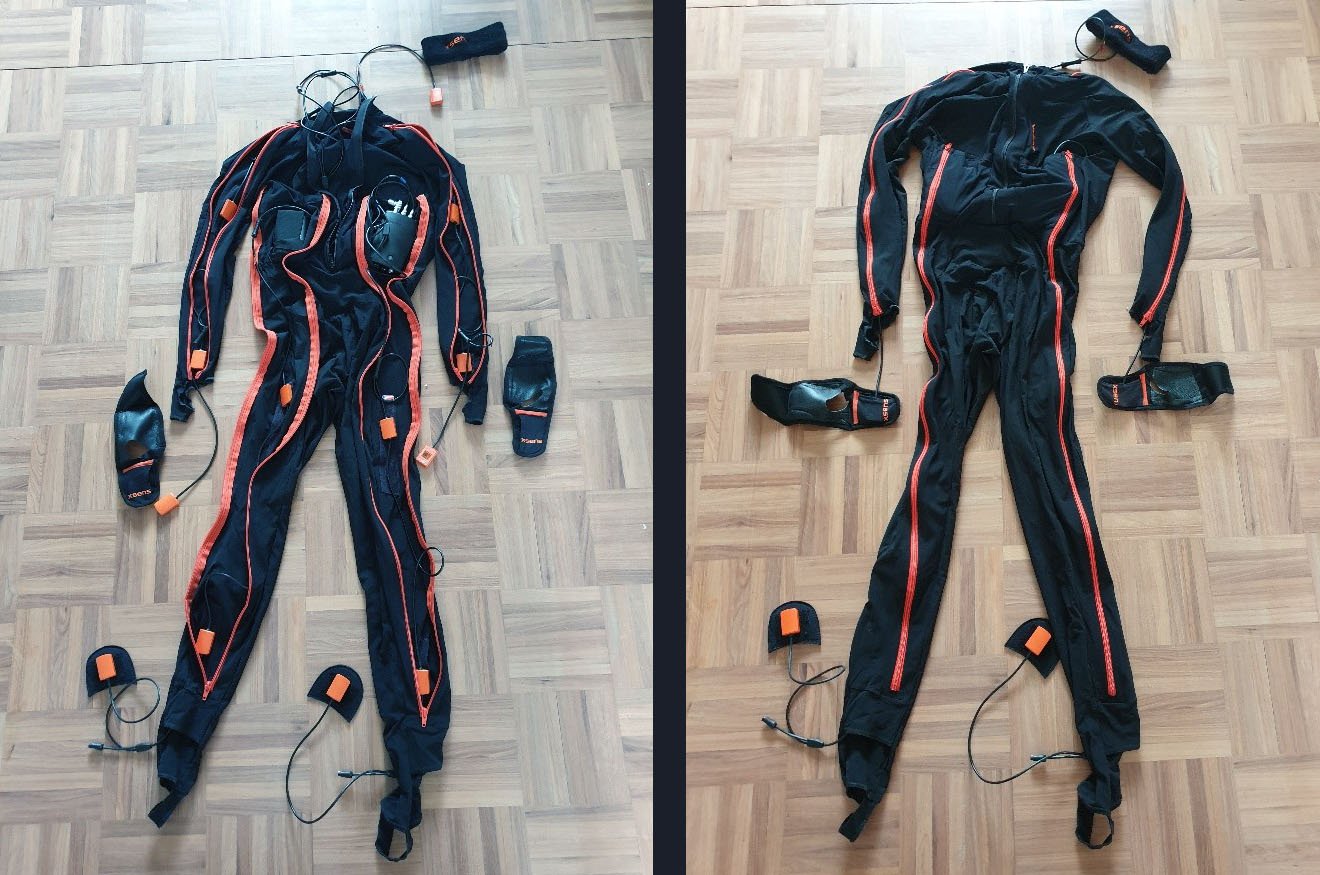
4. After all 17 body trackers are placed and connected to the body pack, put the suit on. The body pack and battery should be on your back, not the front of your body.
5. Then, grab the gloves, headband, and foot pads to place the hand, feet, and head trackers.
Instructions for MVN Awinda (straps)
1. For the Awinda system, lay out all elastic straps on a flat surface (e.g. table or bed), turn the MTw2 trackers on, and place them on each appropriate strap.
2. Use this tutorial on Preparing MVN Awinda Hardware as a guide. The elastic straps have four different widths for the Pelvis, upper legs, upper arms, and forearm trackers.
3. Once the trackers are on the correct straps, place them on your body as shown in the tutorial video. Use the straps to hold the trackers in place.
Step 4: Hardware Connection
Instructions for MVN Link (lycra suit)
1. For the Link System, press the button on the body pack once and wait for it to connect to the Asus router. The body pack will make a “happy” sound like “doo do DOO” when it connects to the Asus router.
2. Open MVN Animate, go to File, Start Motion Capture, and confirm that there are green spheres around the avatar on the right side of the motion capture configuration window.
Instructions for MVN Awinda (straps)
1. For the Awinda system, make sure the Awinda station (the one with the antenna) is connected to your PC. 2. Open MVN Animate, go to File, Start Motion Capture, and confirm that there are green spheres around the avatar on the right side of the motion capture configuration window.
Step 5: Calibration
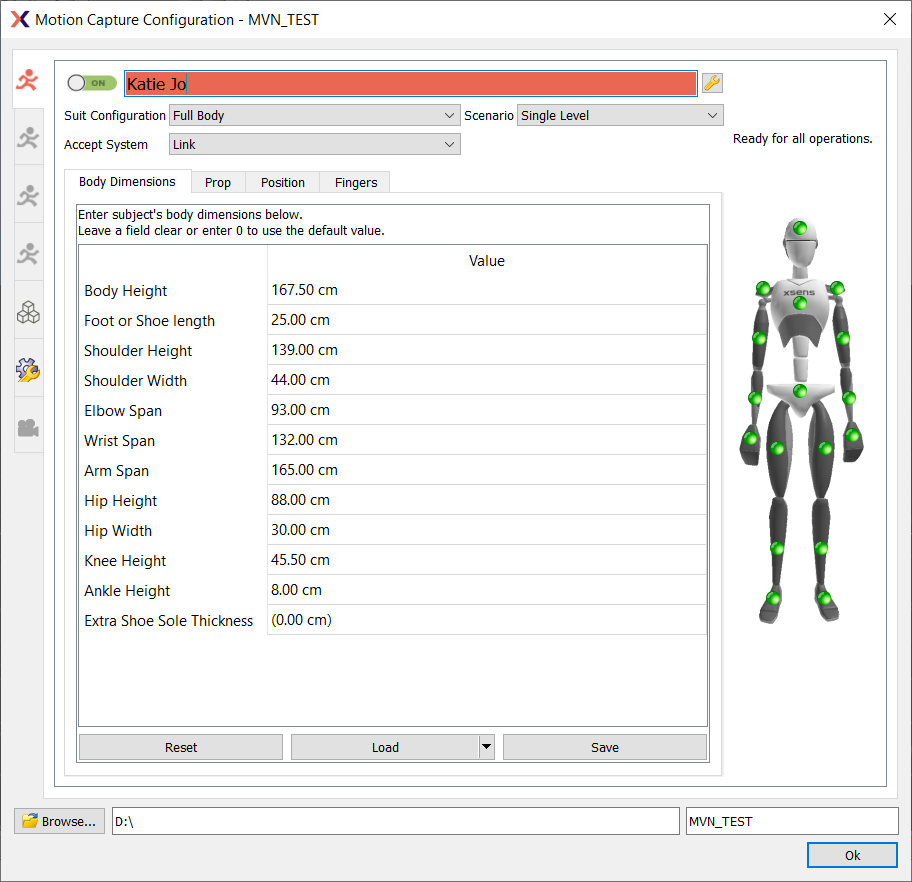
1. For a quick calibration, only measure and enter your body height and shoe length. The software will make educated guesses for the rest of the body dimensions.
2. Provide a file path for where you would like the recorded data to be saved and give you take a name in the “name of session” field.
3. Press OK. You should see the avatar moving in the viewport.
If you are alone:
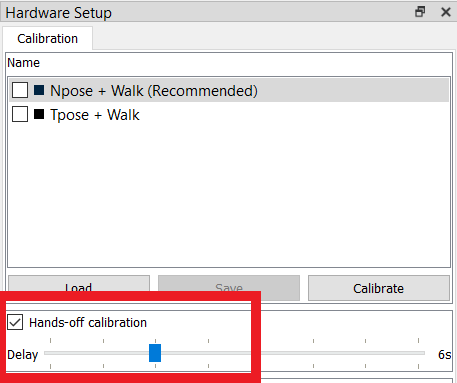
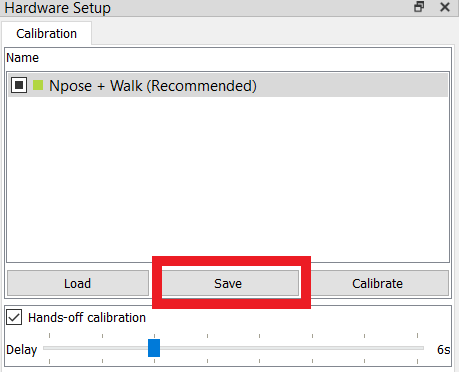
1. Start the calibration by checking on the “Hands-off calibration” box below the calibration tab in the hardware setup window. You can adjust the delay to give you enough time to get into the n-pose for the calibration process.
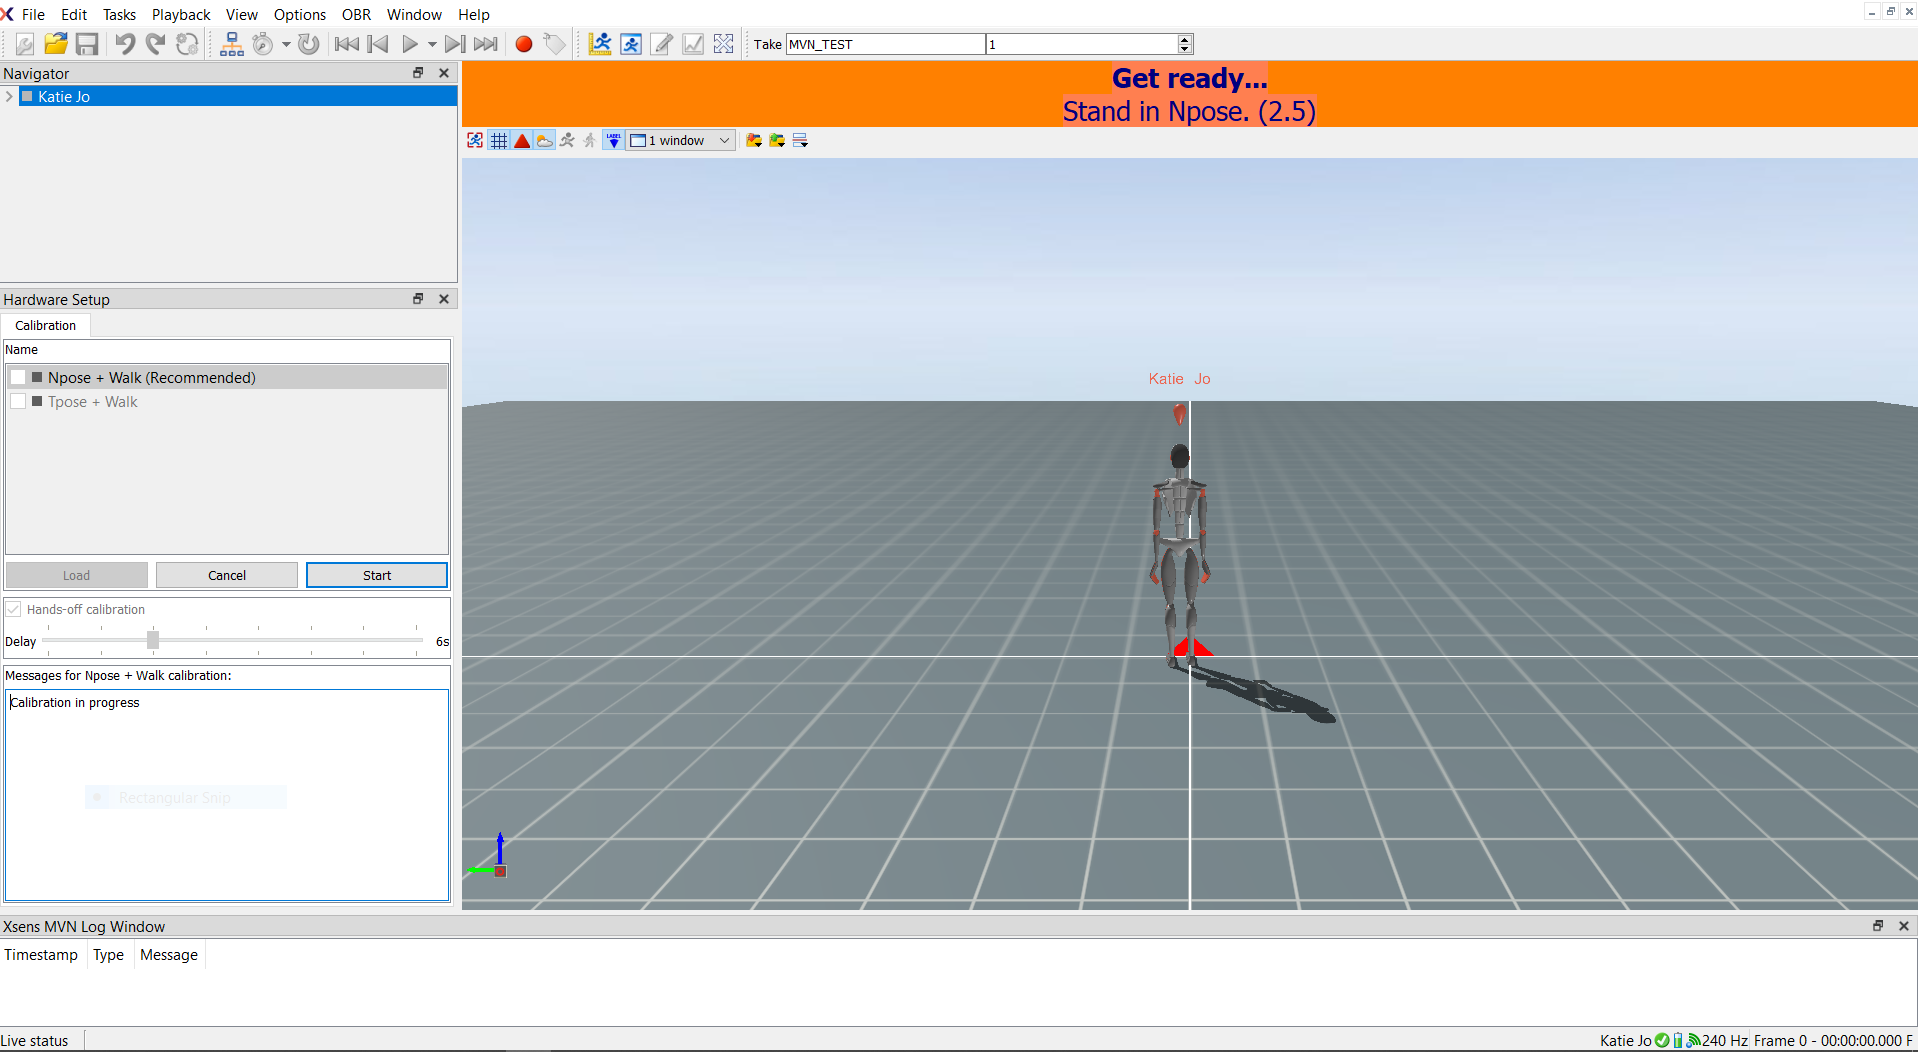
2. Press calibrate, press start, and walk over to your starting position. You’ll want to be standing in a place where you can see the MVN screen and be far enough away to walk at least 15 feet/4.5 meters straight ahead of you.
During calibration, MVN plays back an example video. It is not a live feed of you. To better understand the calibration process, please watch the tutorial on Calibrating Link or Calibrating Awinda.
After the calibration processing, walk around the room in big figure 8 for about 30 seconds. Then, save your calibration by clicking “save” next to the calibration button.
Step 6: Capture Data
Start capturing data by pressing the red button in the tool bar. You’ll know it’s recording when you see it spinning. To stop the recording, press the spinning red button. A window will automatically popup asking if you would like to “save” or “discard” the file.

Step 7: HD Reprocess and Export Files
Reprocessing
All captured files must be reprocessed to be exported. There are 2 levels of reprocessing, HD Reprocessing for super-smooth data and Normal for smooth data. You can find the reprocessing options under the Reprocess Button ![]() (or under Tasks > Reprocess). For more information, please read this article about Reprocessing.
(or under Tasks > Reprocess). For more information, please read this article about Reprocessing.
Exporting
When exporting files, go to File, Export, and choose your export method. For more information, please read this article about Exporting. The method is determined by the number of files you need to export. For example.
If I need to export a few files, I’ll open the files in MVN, HD Reprocess them, wait for the HD Reprocessing to complete, and then I’d go to File, Export, and choose Export all open files.
If I need to export many files, don’t HD Reprocess each file individually in MVN. Move all the desired .mvn files to a separate folder. Then go to File, Export, Batch export in MVN. The batch export can HD Reprocess files simultaneously.
You are now ready for motion capture!
Get your own in-home mocap studio!
To get an in-home mocap studio up and running. Find out more about and request a quote:

Related articles